Quick Start
Get signed up and start sending with our APIs, and using our SaaS tools.
Sign up
Sign up online now and try our services and SaaS tools for free for a limited time at the Portal.
You must have an account to continueSign up now, as you can’t continue with this guide without an account.
Once you have completed the signup process, log in in to the Portal with your new credentials.
What is an API Space?API Spaces are logical partitions used to own distinct data and settings.
As a new user, once you log in, you’re presented with a pop-up where you can add your name. We automatically create you a new API Space.
Your API space
- Expand the API Space drop-down menu at the top of the page.
- Select your new API Space.
- Expand the Hub section of the left side menu and select API Space Details.

I can't see the left menuThe left hand menu automatically hides if you’re not using a widescreen resolution. Select the 3 horizontal lines in the top left to open the menu.

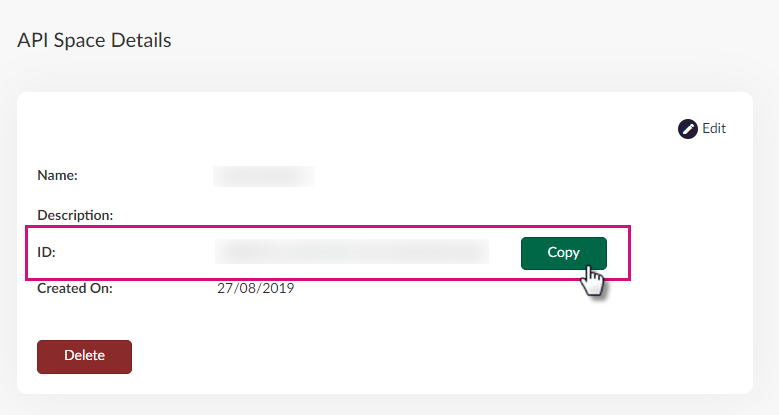
API Spaces are identified using a GUID, which we refer to as the API Space ID. All our APIs require the API Space ID in order to be called, so they can identify what data to access. You can find you API Space's ID on the API Space Details page. Select Copy to copy the ID to your clipboard.
Create an access token
- Expand the Hub section of the left side menu and select Access Tokens.
- Select Add new access token.\

- Enter the Name and Profile ID fields.
- The Name field describes the access token or its intended purpose, for example, the system that it’s used with.
- The Profile ID field is for setting the identity for the token — the profile this token represents. This is particularly useful for App Messaging where you want to message users as a virtual system user.
- Select Next.
- Set your access token permissions. There are a many different sets of permissions to choose from, but for our purposes, select the One API Access - All Channels + Branch checkbox.
Learn more about permissions.

- Select Create to create the access token.
- Your access token is displayed. Select Copy to copy it to your clipboard.
⚠️You must copy this now and store it somewhere safe, as it cannot be retrieved once you have navigated away from this page for security reasons.
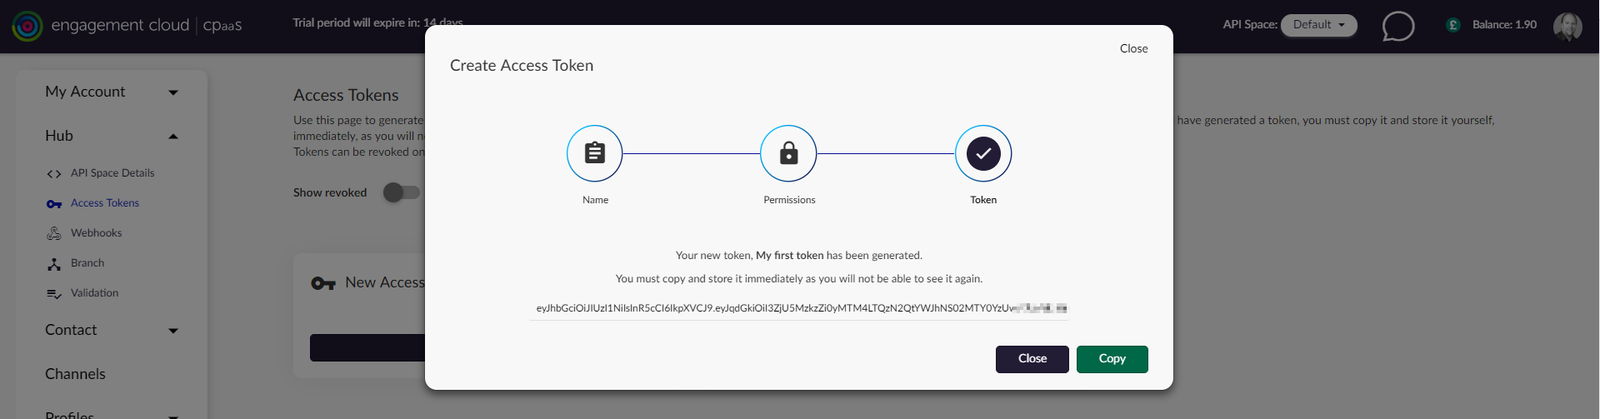
Ensure you store your access token securelyYour access tokens must be copied and stored securely when they are displayed, as they can’t be retrieved again after this time, only revoked.
Send an SMS
Once you have an access token, you can send a message using the Enterprise Communications API.
Below we provide some JavaScript based on JQuery to call the Enterprise Communications API to send an SMS.
To try it:
-
Select Edit in JSFiddle above the code samples provided below.

-
Enter your API Space ID, access token and mobile number to try the service.
Don't embed your access tokens client sideThis is just an example to show you the process to call the API. Do not embed access tokens into client side code as it is insecure.
Next steps
Now you're ready to get started with the Enterprise Communications API and can incorporate other channels such as WhatsApp.
Learn more in the Channel guides.