Opt-ins
Gather and manage opt-ins.
The opt-in system
We offer an optional opt-in flag system to assist you with achieving GDPR compliance.
The system automatically adds opt-in flags for each channel to a profile. These flags can then be used to stop messages from being sent to the profile unless they have opted in on a specific channel. This means you can ensure that marketing messages are not sent to profiles who have not opted in to them.
Set opt-in status defaults
You can set a default opt-in status for a profile in the portal.
To do this:
-
Log in to the portal.
-
Expand the My Account section of the left side menu and select Data Preferences.\

-
Under Opt-in management, select the switch for a channel to set the default opt-in behaviour:
- Inactive switch: default to opted-out.
- Active switch: default to opted-in.
-
Select Save data preferences.
View opt-in status for a profile
Opt-in flags can be viewed and updated by looking up an individual profile.

To locate an individual profile:
-
Expand the Profiles section of the left side menu and select Create/Search.
-
Under Search profiles, expand the Enter a property drop-down menu and select the property you want to search by, for example, Phone number.
-
Expand the second drop-down menu and select your search qualifier, such as starts with.
-
For Enter a value, enter the value to use for your search, for example, 4479.\

-
Select Search.
-
Select the profile you want to view from the table at the bottom of the page.
The opt-in status of each channel is listed under Available channels for marketing communication in broadcast.
Update opt-in flags
You can change the value of a channel’s opt-in flag in a number of ways, both manual and process driven.
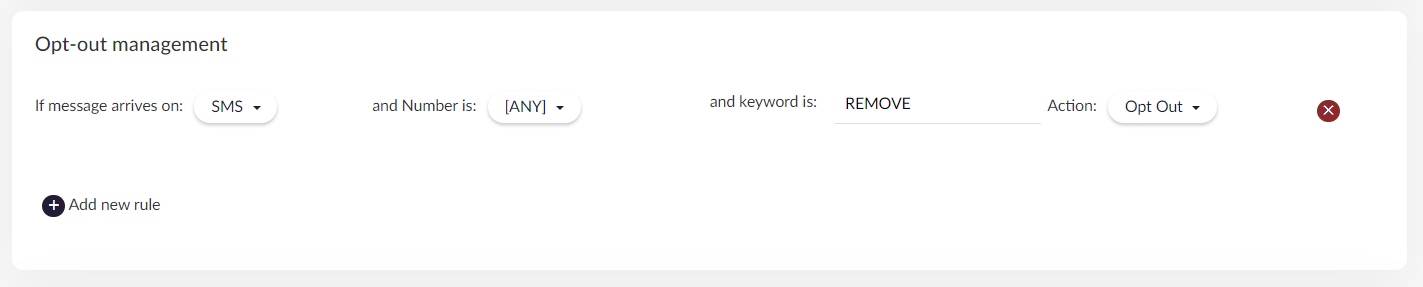
Use opt-in rules
You can set up rules that run against any inbound messages received on a specific channel to either opt-in or opt-out the profile who sent the message.
To set up these rules:
- In the Portal, go to My Account > Data Preferences.
- Under Opt-out management, select Add new rule.
- Expand the drop-down menu and select the channel you want to control the opt-in flag for.
- You then have the option to specify other channel specific criteria, such as the phone number an SMS is received on, and the keyword the message needs to begin with to trigger the rule.
- Expand the Action drop-down menu and select whether the rule opts-in or opts-out the profile.
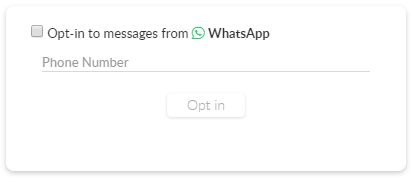
Use web opt-in forms
You can add opt-in points to your existing websites using web opt-in forms. These forms can be integrated into your website using small code snippets. The code snippets can be copied and pasted into your web pages, and utilise iframes to ensure our web code runs encapsulated from your web page, ensuring security and compatibility.
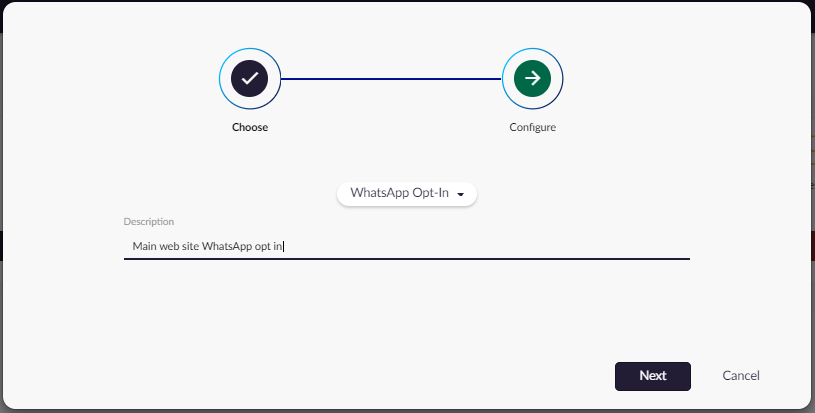
To create a web opt-in form:
-
Go to Channels > Opt-in forms.
-
Select Add.\

-
Expand the drop-down menu and select the channel you want to create an opt-in form for.
-
Add a description then select Next.\
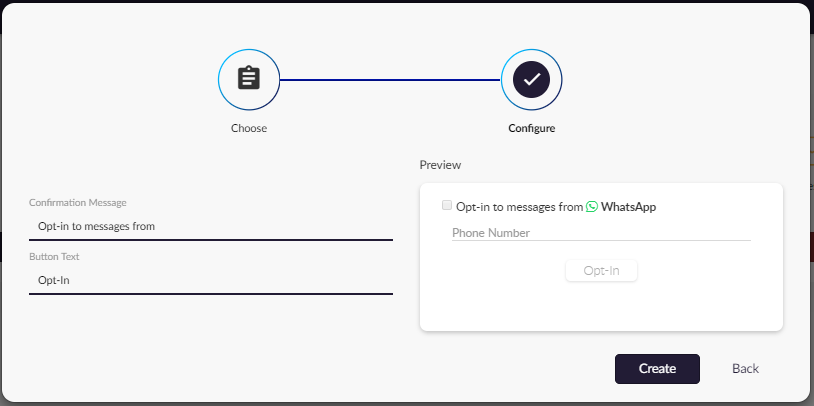
-
Enter a Confirmation Message to be displayed on the opt-in form. You can see your message in the form preview.
-
Enter the Button Text for the form call-to-action button.
-
Select Create.\
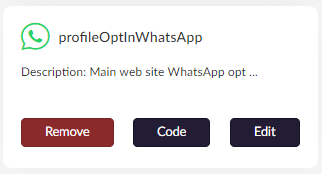
-
Your newly created form appears on the Forms page. Select Code to access the HTML you need to add the form to your web page.\
-
Select Copy Code and either manually add this to the source code of the web page you want to add the form to, or if you use a tag manager, you add the code snippet this way.\

-
Test your opt-in form, and check that the opt-in flag for the channel is set for the profile associated with the telephone number or email address entered in the form.
You now have a opt-in form that automatically updates your profiles opt-in flags in your website
Use profile
You can manually set the opt-in status for a channel for a profile by:
- Looking up the profile in the portal and updating the flags manually.
- Using the Profile service to change the values using the API.
The Broadcast tool
The Broadcast tool found in the Contact menu automatically utilises the opt-in flags. Any contacts you wish to broadcast to are only sent to if they have the opt-in flag for that channel set.
If you need to avoid this because you’re only sending non-marketing messaging, you can set the defaults for the opt-in flags to
true.
Use opt-ins with the Enterprise Communications API
If you want the Enterprise Communications API to check the state of the opt-in flags for a user prior to allowing a send, you can set the requireOptIn flag in the request.
Learn more in Additional options.