Permissions
We support and recommend the security principle of least privilege by allowing you to create access tokens for your systems with only those permissions required to access the services and perform the functions they require.
Use least privilegeRather than creating a single access token with many permissions, you should consider creating multiple access tokens and only granting the permissions needed for each system. This increases security and limits damage should you ever have a token compromised.
Manage access tokens
- Log in to the Portal.
- Go to Hub > Access Tokens.\

On the Access Tokens management screen you can create, revoke, and view the permissions for access tokens.
Create an access token
-
Select Add New Access Token.
-
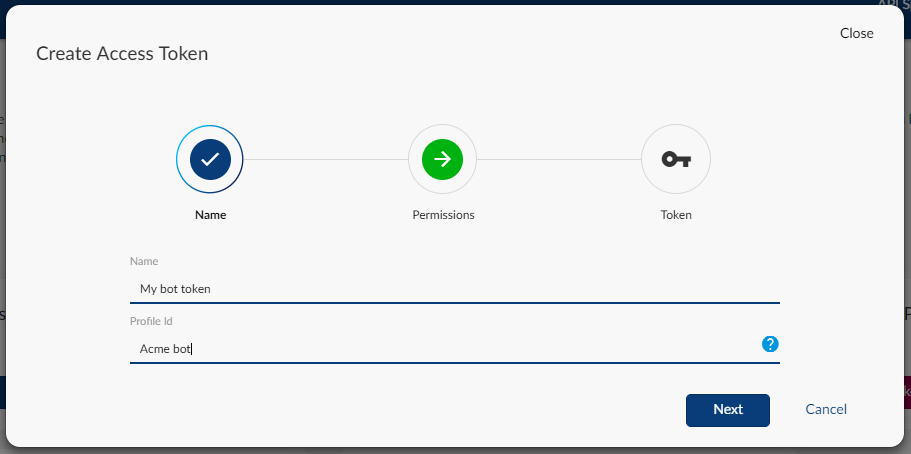
Enter a Name and Profile Id.
The Name field describes the access token or its intended purpose, for example, the system that it's used for.
The Profile ID field is for setting the identity for the token; the profile this token represents. This is particularly useful for App Messaging where you want to message users as a virtual system user. For some channels such as SMS, this has little effect.
-
Select Next.
-
Select the permission sets you want to use for the access token.
Permission sets
To make it easier for you to assign the required permissions to your token, we’ve created some permission templates based on common uses, such as:
- Use the Enterprise Communications API to send on all channels.
- Use the Enterprise Communications API to send on all channels, plus Branch.
- Manage profiles and data.
- Create Facebook opt-in data.
- Manage App Messaging conversations.
You can select all the common scenarios that you require for your access token. For general sending, we recommend One API Access – All Channels + Branch.
Advanced permission setting
Select Advanced options to tweak your permissions at the most granular level and add permissions for other services such as platform configuration services.
Each service and it associated permissions are shown in a tree view, with any permissions you have already applied using the common permission sets displayed.
Simply select or clear the options until you have the permissions you want and then select Save.
Store your token
Select Create to create your token.
You cannot change permissions once the token is created.

Your access token is displayed. Select Copy and store the token somewhere safe.
The token cannot be retrieved once you have navigated away from this page for security reasons.
Revoke an access token
Revocation cannot be undoneRevoked access tokens cannot be reinstated, so you must be sure before revoking.
If you have an access token compromised, or simply need to rotate them as part of your security practices, you can revoke a token.
To do this:
- Go to Hub > Access Tokens.
- For the token you want, select Revoke.
- On the confirmation message, select Yes, revoke it!.
This cannot be undone.