Custom channels
Set up custom channels to deliver messages to your customers.
You can configure and use custom channels to allow you add integrations to other systems to send messages. This could include existing third-party systems such as email providers or your own bespoke systems, ensuring you can communicate with your users using the channels you need.
You need to setup a Custom channel before you can reference it in sends using the Enterprise Communications API.
Learn more in our Enterprise Communications API documentation.
Set up a custom channel
- Log in to the portal.
- Go to Channels > Configure.
- In the Custom Channel section, select Add new channel.\
Existing custom channels are also displayed here. To edit an existing custom channel, select Edit, or to remove it, select Remove.\

Channel details
-
Enter a name and URL for your custom channel.
This is the URL of the external web service you want to call. -
Expand the HTTP Verb drop-down menu and select the HTTP action you need to invoke on the URL, usually a POST.
-
Enter the Content Type for the body to be sent, for example, application/json.
-
For UserId property name enter the profile property to be used to identify the recipient for the message, for example, email. This is mapped to the
userIdmerge field for the body template.\
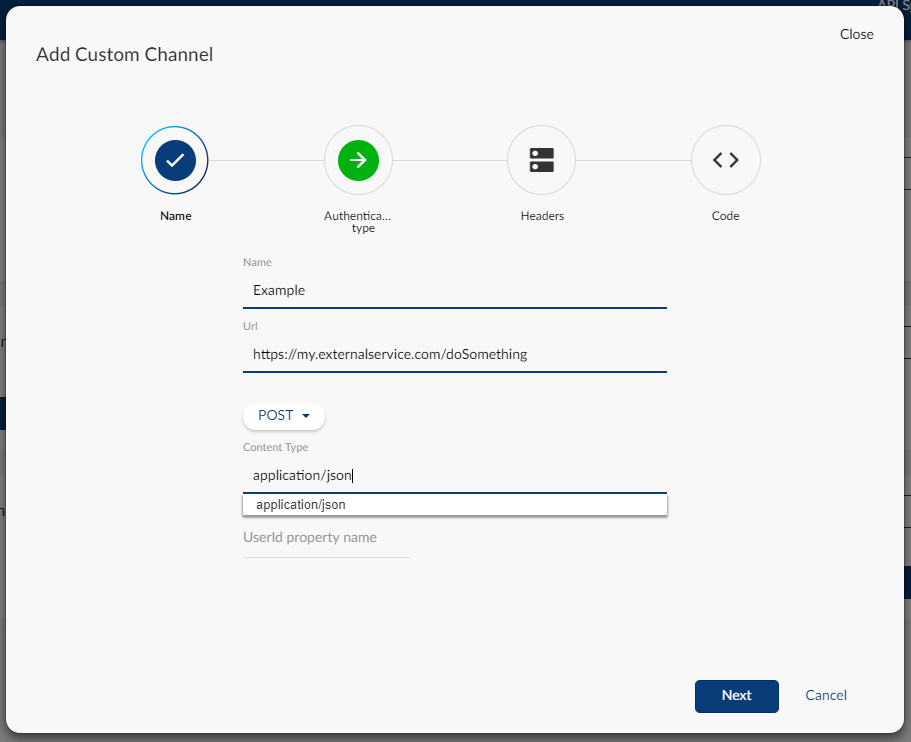
-
Select Next.
Authentication
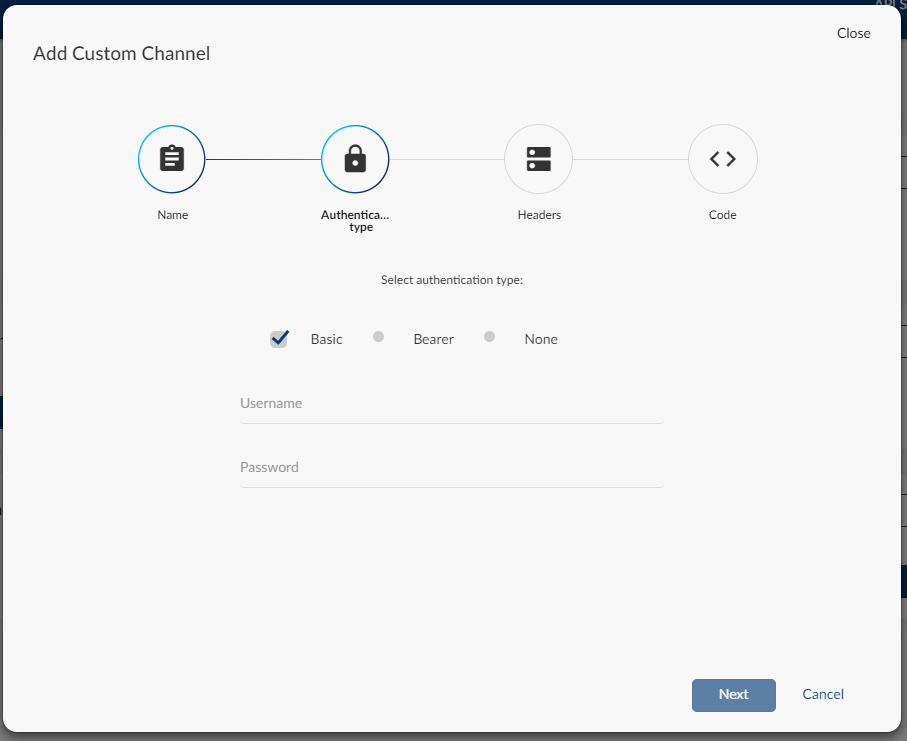
-
Select the authentication method your target web service uses:
- Basic
Basic HTTP authentication; enter a username and password. - Bearer
Token based authentication; enter your bearer token. - None
No authentication or custom HTTP headers used.
- Basic
-
Select Next.
Headers
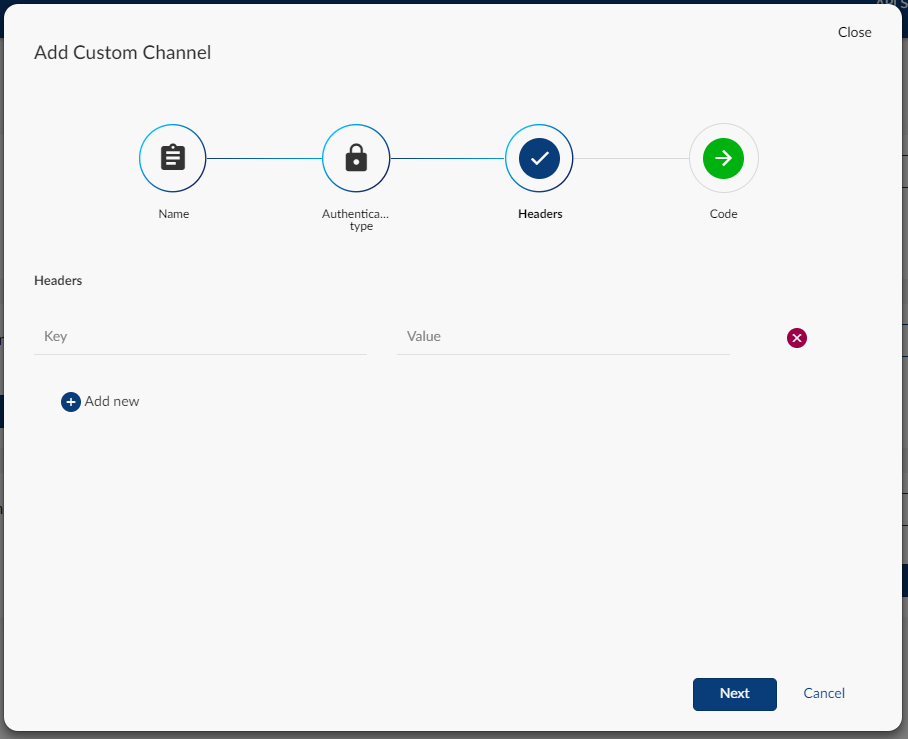
-
Add any custom HTTP headers you want as a key-value pair. Select Add new to add additional headers.
-
Select Next.\
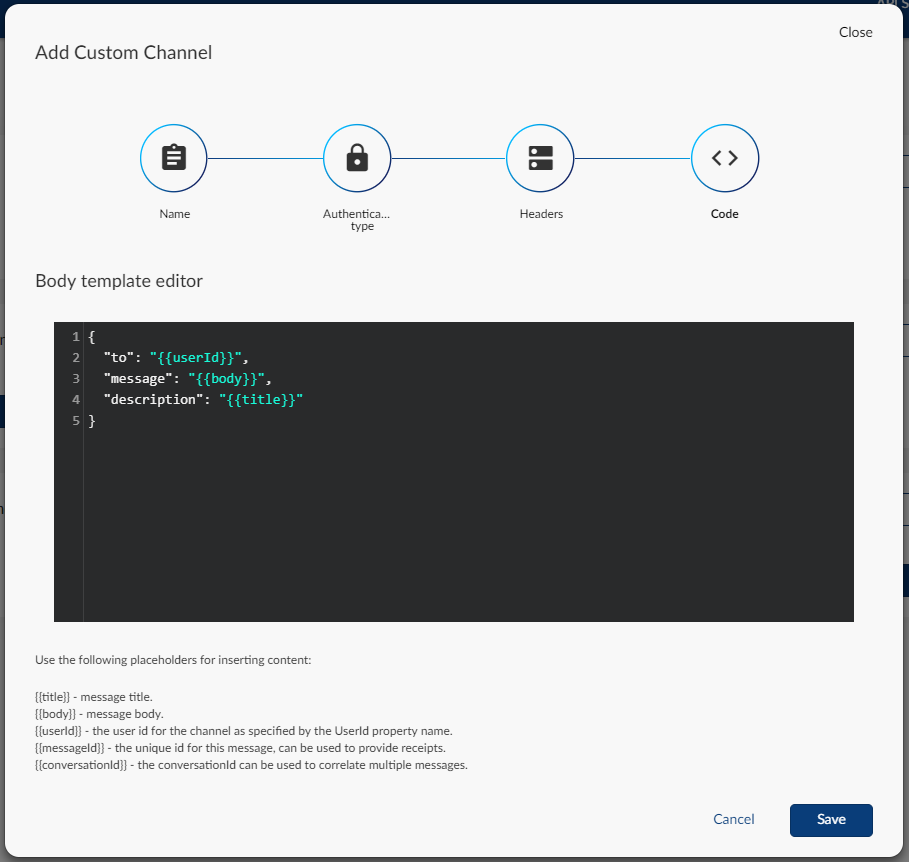
-
Create a template for the web services request using the Body template editor.
You can add the following merge fields into the message in order to target and add content to the message:
| Merge Field | Description |
|---|---|
| {{userId}} | The field used to uniquely identify a user from the profile data as identified by the User Id property specified in the channel details. |
| {{title}} | The title field for the API request message. |
| {{body}} | The body field for the API request message. |
| {{conversationId}} | The unique identifier used to group messages together for a conversation. This should be used if the custom channel supports the notion of individual conversations, and can be optionally passed in calls to the API. |
| {{messageId}} | The unique identifier for the message, as returned to the caller when submitting to the API. |
- Select Save.
To use the custom channel in the Enterprise Communications API, you need the channel ID for the custom channel.
To find the ID:
-
Go to Channels > Configure.
-
Select Id for the custom channel you want.\

-
Select the copy icon to copy the ID to your clipboard.
All custom channel IDs start withcustom_, for examplecustom_myChannel.
Use the channel ID in the rules section of your Enterprise Communications API call to target this channel.